
Custom Search
|
|
|---|
|
|---|
![]()
Lesser Goldfinch family preening
![]()
LCD Vs. CRT - Do LCDs finally match CRTs in picture quality?
ECS P965T-A Motherboard
ABIT AN8 SLI Motherboard
Foxconn 975X7AB-8EKRS2H Motherboard
Foxconn BlackOps Motherboard
![]()
My misadventures flying with Allegiant Air
![]()
The Missing Post Mystery
A post I made to a Vista newsgroup was missing from the Outlook newsreader
Where did it go?
The Missing Post Mystery Revisited
It happened again! A post I made to a Vista newsgroup was missing from the Vista Mail newsreader
Where did it go?
A Case of Maxtaken Identity
When is a hard drive not a hard drive? Find out when!
![]()
Changes to the Windows 7 Taskbar You Should Know About
Vista Image Capture 'Slipstream' SP1 and SP2 into a single Vista install disc
Detailed Instructions for Reverse Integrating SP1 and SP2 into Vista
What is RAID? Some RAID Basics
RAID 5 on a Desktop PC
How to Personalize Windows Vista
Develop and Implement a Personal Backup Plan
Ten things you can do to create better documentation
(Tech Republic)
Flash Your BIOS
Three Good Reasons for Flashing Your BIOS
Ten common mistakes you should avoid when flashing your BIOS
(Tech Republic)
Find a new dial-up ISP
Sign up for 10 free hours of NetZero access!
Create a Shutdown/Sleep/Restart or Continue Icon For the Vista Desktop
What is a computer guy doing with home remodeling projects on his Website?
The Upscale Utility Room Remodel with Catch Basin and Wraparound Ceramic Tile Wall
The Bathroom Remodel for Under $1000 Project
The Do It Yourself Bedroom Engineered Prefinished Red Oak Wood Flooring Installation From Hell
Bedroom Remodel With Wood Parquet Flooring
Use Comodo Internet Security 4.0 to Lock Down Your PC Following a Windows Install or Reinstall
![]()
The Northstar Horizon Microcomputer
![]()
Round-Tailed Ground Squirrels
Prairie Dogs

American Kestrel Falcons "Sparrow Hawk"

Arizona Sonoran Desert
Arizona Sunsets

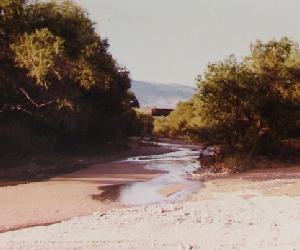
Cienega Creek
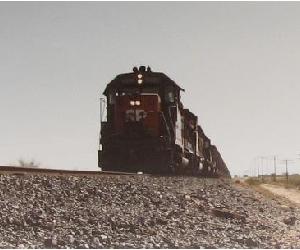
Trains In the Desert
Desert and Mountain Flowers

Fox Squirrels

![]()
The Other Reason Why Your Irrigation Valve Might be Leaking
My Response to the Newegg Affiliates Program Changes
Playing the Rebate Game
Know the Rules Before You Play
Vista Confusion
The four questions you need to ask before buying Vista
Automate the Integration of Vista Service Packs 1 & 2 Into One Install Disc
Before using Vista Image Capture you must follow steps 1 - 6 in the Use Reverse Integration to slipstream Windows Vista SP1 and SP2 article at Tech Republic. Follow the instructions up to the folders creation in step 7 and then follow the instructions below.
Important! If you are imaging a 64 bit Vista installation, be sure to perform the CompCln step or the ISO file you create may not fit on a single layer DVD.
Download and extract the Vista Image Capture zip file to a folder. Run Setup.exe to install Vista Image Capture (VIC). Run VIC and accept or decline the EULA. Select Tools->Capture or click on the picture labeled Click to Capture. The main VIC window will appear with the focus set on the Select tab. A status panel on the right side of the screen details important information about any action needed. Please read the information in the status box carefully - this information will tell you what you need to do next.
There are four important pieces of information that must be determined in order for VIC to work properly:
If you have more than one Vista installation on your system you might have to manually select the Vista OOBE installation that you want to capture. It is important that you select the correct logical drive before creating the image.
The Vista install files will be copied from the original Vista RTM DVD. If the files exist on your hard drive, click the Vista Install Files button and navigate to the folder where the Vista install files exist. In either case, the Vista install files will be copied to the Temp VIC\Vista x86 or Temp VIC\Vista x64 folder.
If you do not select Yes in the Delete Vista Install Files When Done box in the Tools->Options screen, you can create another image at a later date and VIC will use the files copied to the Temp folder on your hard drive. To do this click the Refresh button on the Select screen. VIC should find and use the Vista install files on the hard drive. This will avoid having to copy the install files a second time.
If you install the WAIK normally, VIC will find the folder where it was installed. VIC looks for the Windows AIK folder in the Program Files folder and Program Files (x86) folder on all fixed drives.
VIC will automatically assign the logical drive with the most available free space as the default drive for the Temp files. The Vista OOBE installation drive will be excluded. A folder Temp VIC will be created on this drive at run time. You can select a different drive for the Temp files by clicking on the Temp Folder button.
VIC will check to see if you have enough disk space for the Temp files. The colors in the grid represent:
The colors in the grid are based on the assumption that the CompCln step was performed. If you did not perform the CompCln step, you will need additional disk space.
VIC will automatically search for the above four items. If found, a green 'OK' icon will appear next to the item. If the path is incorrect or missing for any item, click the button next to the item, navigate to the drive or drive and folder and click the OK button to select the correct path. When selecting a folder please double-click the folder
All four icons must be green before the Steps and Run tab will be accessible. Once the four items are found, proceed to the Steps tab by clicking on the tab or clicking the Next button.
On the upper left of the screen you should see a box labeled Clone. Select the Yes option under Clone if you want to create a Vista RTM bootable ISO image in addition to creating the SP integrated ISO image. This is useful for creating a RTM backup DVD or creating a bootable Vista RTM DVD if you only have the Vista setup files.
You should see the OOBE edition of Vista that you installed just below the Clone frame. If no edition is selected, or the wrong edition is selected, click the edition you installed.
One Windows Vista edition will be imaged - the one you selected at installation time. This is an important consideration if you plan to upgrade from one edition to another at a later date. You will only be able to use the DVD that VIC creates to install the edition that you installed. If you do upgrade at a later date it will be necessary use the original RTM disc to do the installation or you will need to create a new VIC DVD with the upgraded edition selected.
Verify the steps that will be performed. When you have satisfied with the settings and the steps to be performed, click the Run tab or click the Next button.
You can change the Compression option on this tab. Choosing Fast will greatly speed up the time to create the image but will create a slightly larger WIM file.
The Volume Label option will have the name of the DVD you will be creating in the format [edition] [bit version] [service pack] or Ultimate x86 SP2 for example. When using the Clone option the Volume Label will default to Vista [bit version] RTM. You can change the name but it is a good idea to keep the name short. If you change the name, click the Update button when done.
The exact DOS commands that VIC will execute are listed on this tab. Verify that the paths are correct and click the Run button to start the ISO creation process. Advanced users can select Allow under Edit Commands in the Tools->Options screen to enable editing of the DOS commands.
Warning! Changing any of the commands can break the imaging and ISO creation process. Only experienced users should attempt to edit the commands.
The options screen allows you to:
The default values are:
| Option | Value |
|---|---|
| Select Lanuage | English (Determined in EULA) |
| Delete Vista Install Files When Done? | Yes |
| Compression | Maximum |
| Startup Options | Use the Default Options at Startup |
| Edit Commands | Disallow |
Click the Use the Options Set Here at Startup radio button to change and use the Delete Vista Install Files When Done?, Compression and Edit Commands options.
When VIC is done an ISO file called [edition] [bit version] [service pack].iso will be created in the Temp VIC\ISO folder. For example, if you are imaging a Vista x64 Business edition with SP2 installed the file name will be Business x64 SP2.iso. Use any disc burning software that can burn an ISO image to a DVD to burn the ISO image.
| Screen | Keys | Action |
|---|---|---|
| Splash Screen | F1 | Help->About |
| F3 | File->Exit | |
| F4 | Tools->Capture | |
| F5 | Tools->Clone | |
| Main Screen | F1 | Help->About |
| F3 | File->Exit | |
| F8 | Tools->Options |
|
|

|

|
|
| Pecos SoftWareWorks Home | Contact Me | Terms of Use Rev 09/30/10 | Privacy Policy Rev 05/20/09 | About Us | Site Map |
| Tweet |
|
||
|
© Copyright 2007-2015 Alan Norton None of the content may be used or reproduced without written authorization from Alan Norton. |
|||